Guinea pigs are curious, active little creatures that thrive on mental stimulation and physical activity. While pet stores offer plenty of toy options, making your own DIY toys can be just as enriching—often for a fraction of the cost. Plus, it’s a great way to upcycle household items and add a personal touch to your guinea pig’s playtime.
Below, we’ll explore easy, safe, and budget-friendly DIY toys for guinea pigs they’ll love.
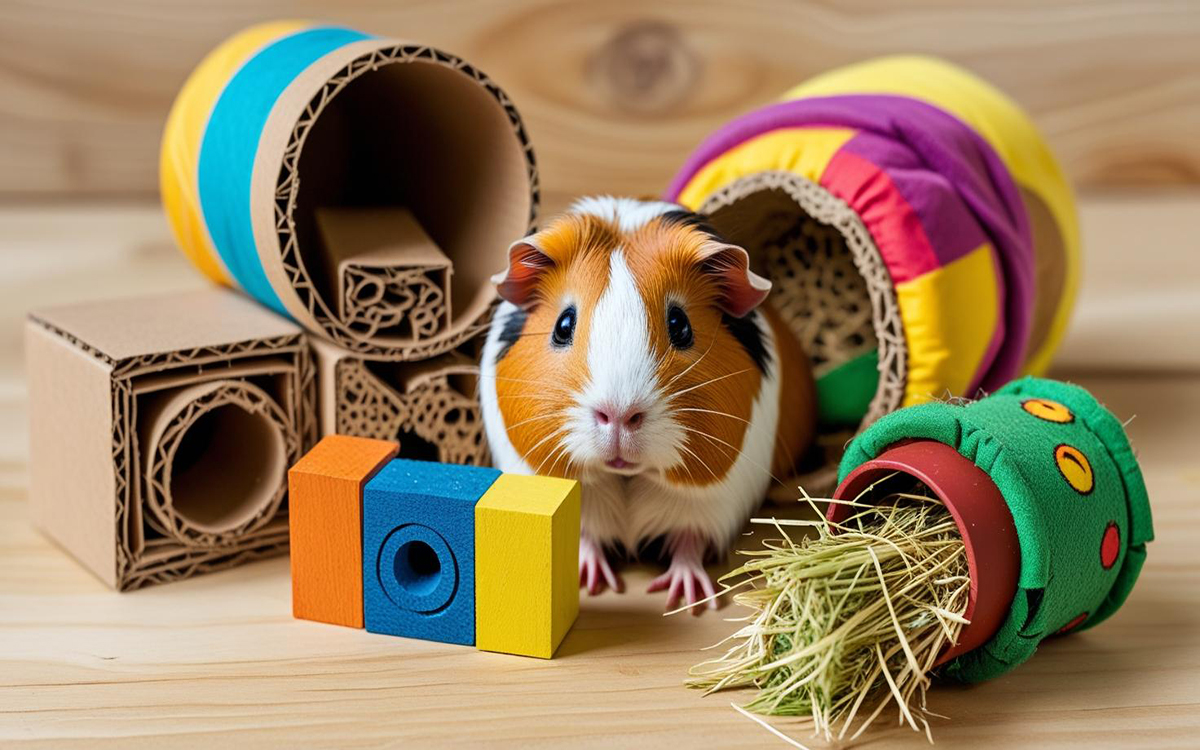
Why Homemade Toys For Guinea Pigs Are Great
✅ Cost-Effective: Most projects use items you already have at home.
✅ Customizable: You can tailor toys to your guinea pig’s size, preferences, and play style.
✅ Eco-Friendly: Many toys can be made from recycled materials like cardboard, paper, and fabric.
✅ Bonding Opportunity: Making toys for your piggies is a fun way to connect with them and learn what they enjoy.
Safety First
- Skip treated/painted wood; use apple, birch, willow, or kiln‑dried pine only.
- Avoid tape/glue where it can be chewed. No staples.
- Remove soggy/soiled cardboard daily.
- Supervise anything that hangs (twine/rope); stainless steel skewers are safer.
Easy DIY Toys For Guinea Pigs
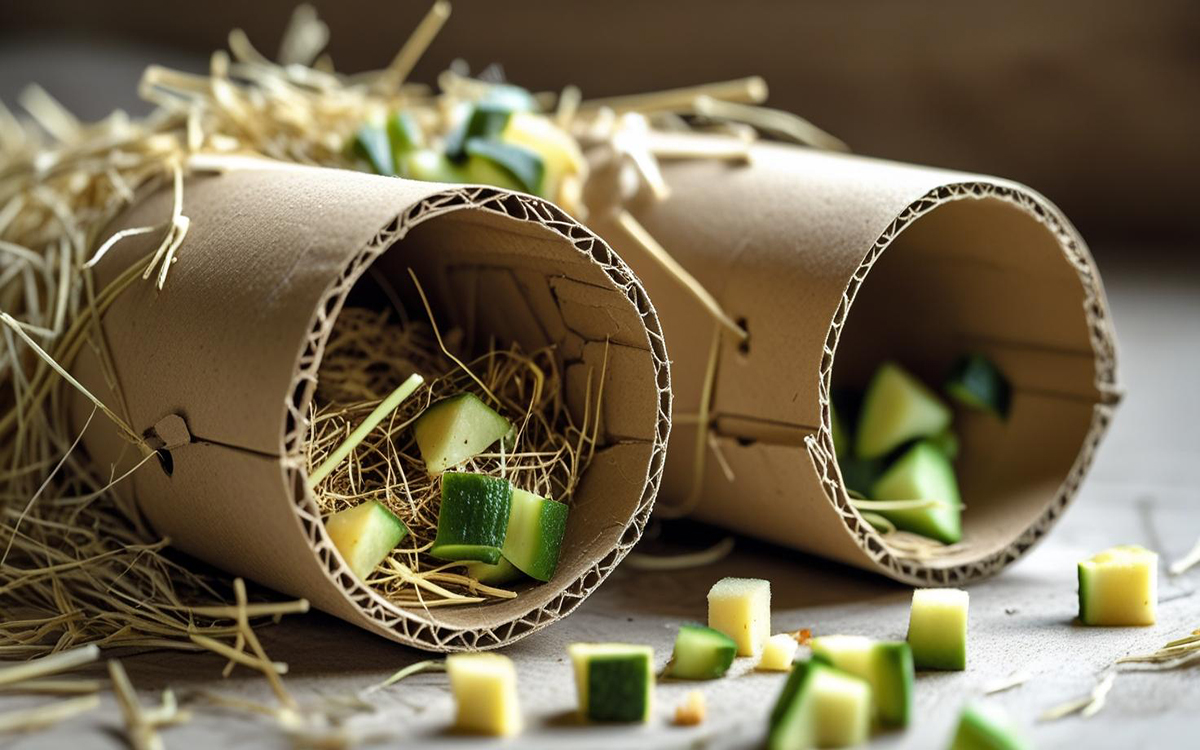
1) Cardboard Tube Treat Roller
You’ll need: 1 toilet‑paper tube (or cut a paper‑towel tube to 4–5″), hay, 1–2 tsp diced veg, optional pinch of dried herbs.
How to Make It
- Prep tube: Flatten gently, then pop back open—this loosens the fiber and removes sharp “memory” creases. Check for glue clumps and peel off.
- Pack base layer: Push in a fluffy pinch of hay so ~½” sticks out one end (gives an easy “start”).
- Add rewards: Drop in 6–8 tiny veg cubes (⅛–¼”) and a pinch of dried herbs.
- Top off: Loosely fill to the other end with hay (don’t compress).
- Crimp ends: Fold each end inward just ¼ of the circle—enough to slow treats, not seal.
- Test roll: It should roll freely and shed small hay strands; if nothing falls out, un‑crimp slightly.
- Serve & rotate: Offer for 20–30 minutes, then remove and reuse once dry.
2) Paper Bag Hideout
You’ll need: 1 unprinted lunch bag, 1–2 cups hay, a few veg slices or herbs.
How to Make It
- Open & reinforce: Puff the bag open; roll the rim outward one full turn to strengthen the entrance.
- Vent & view (optional): Snip a 1″ “peek” window on the side (reduces startle, improves airflow).
- Fill: Add 1–2 cups hay; tuck 4–6 tiny veg bits deep inside.
- Shape: Lay the bag on its side and press gently so it forms a low tunnel (easier entry).
- Place smart: Position against a wall or in a quiet corner to reduce sliding and increase confidence.
- Refresh: Replace if damp or flattened; new bag every 1–3 days depending on chew enthusiasm.

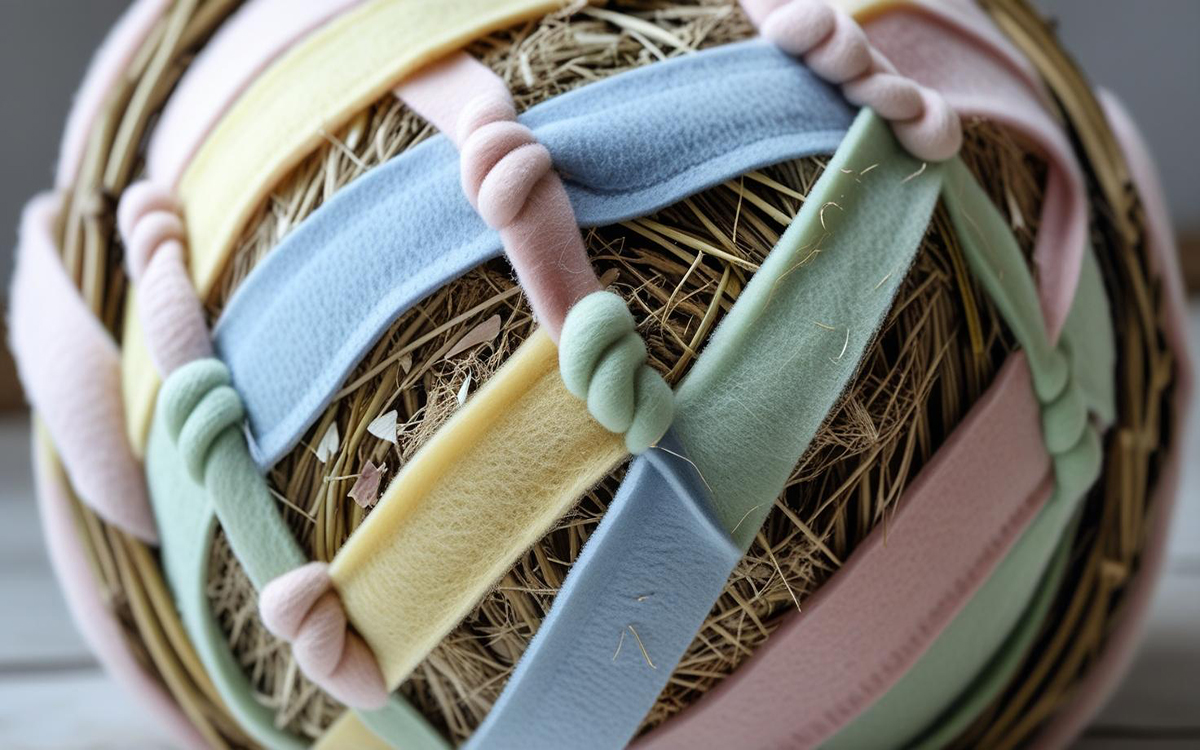
3) Fleece Rag Ball
You’ll need: 1 willow/hay ball (3–4″), fleece strips (1″ × 6–8″).
How to Make It
- Cut & prep: Trim 20–30 fleece strips, pull gently to soften edges (fleece doesn’t fray).
- Anchor knots: Thread a strip under one cane of the willow ball, tie a single snug knot; tails should stick out 2–3″.
- Even coverage: Space strips evenly around the ball (like a globe’s longitudes) to avoid one heavy side.
- Forage core: If hollow, stuff a ping‑pong sized tuft of hay and 3–4 tiny veg pieces inside.
- Safety check: Tug each strip; if any knot slides, retie. Avoid super‑tight double knots (you’ll want to remove for washing).
- Wash cycle: Remove fleece after play, machine‑wash warm weekly; sun‑dry the willow ball to keep it crisp.
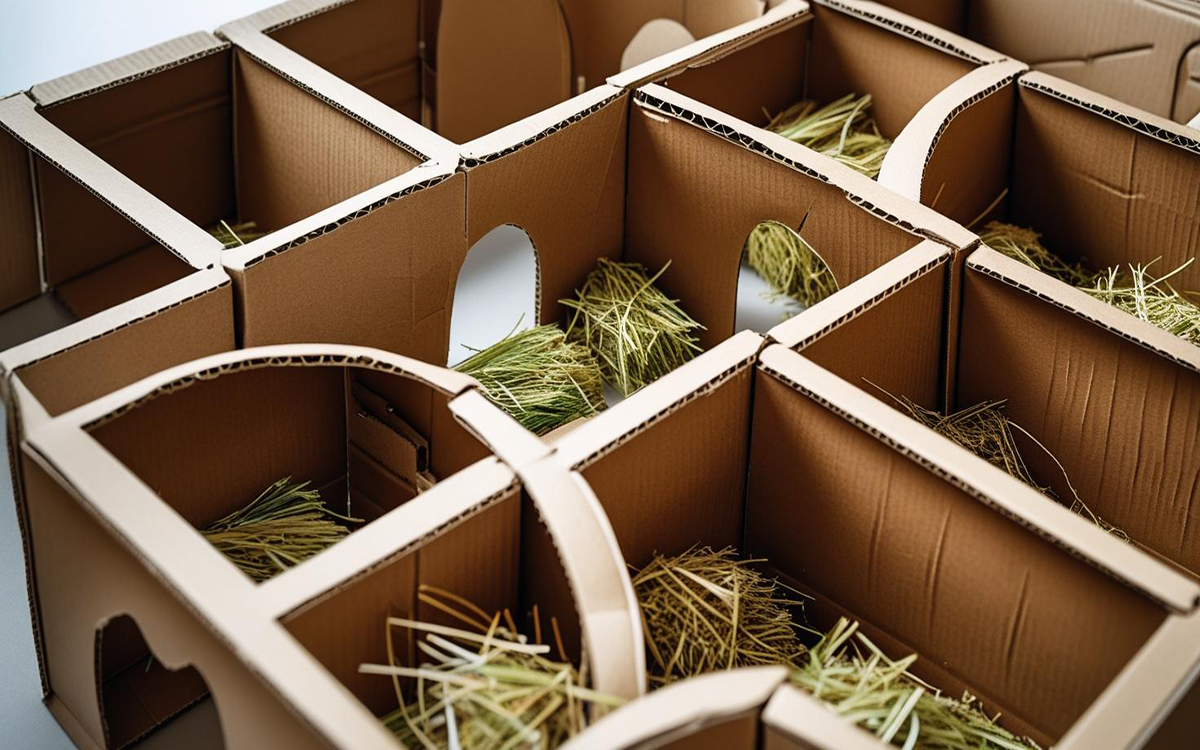
4) Cardboard Maze
You’ll need: 3–6 same‑height boxes (shoebox/boot‑box), scissors/box cutter, optional non‑toxic paper tape.
How to Make It
- De‑flap: Remove lids and inner flaps so tops are open.
- Doorways: Cut 4–5″ wide, 3–4″ high arches in facing walls; round top corners to prevent tearing.
- Layout: Arrange boxes in a U or S shape; alternate single and double doorways for “choices.”
- Stabilize: Tape outside seams only if needed. Keep tape edges out of chewing reach.
- Zoning: Sprinkle mini hay piles or 2–3 pellets in some chambers; leave others empty as “rest rooms.”
- Escape route: Ensure at least two exits from the overall maze to reduce anxiety.
- Sessioning: Offer for 15–20 minutes; store flat between uses to keep boxes crisp.
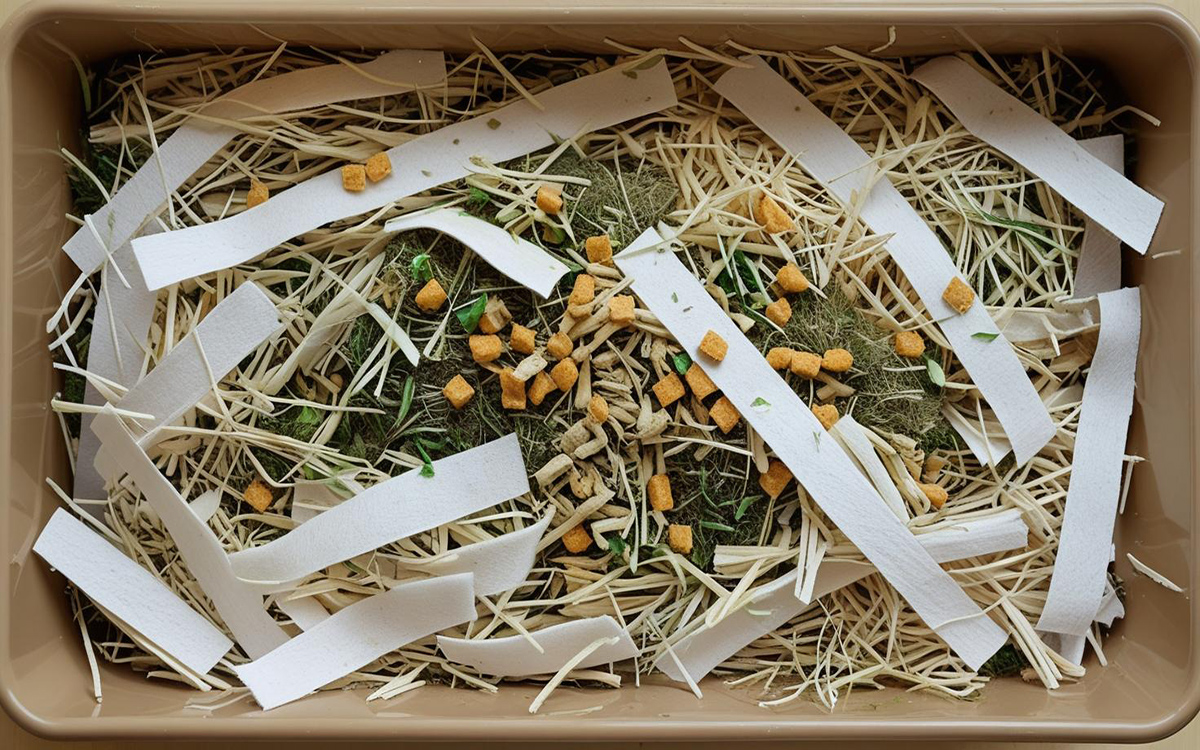
5) Foraging Tray
You’ll need: Low tray (1–2″ lip), shredded plain paper or fleece strips, hay, 1–2 tsp pellets or veg bits.
How to Make It
- Base layer: Add 1″ of shredded paper/fleece; mix in a thin handful of hay for scent and structure.
- Seed treats: Scatter 1 tsp pellets or veg bits; lightly toss to bury ~50%.
- Top layer: Add a sparse ½” cover so treats are discoverable with minimal frustration.
- Difficulty dial: For beginners, leave ~30% of treats visible; for advanced foragers, fully hide but reduce total volume so they succeed within 5–10 minutes.
- Clean up: Remove damp paper after play; wash plastic trays with hot water and dry completely.
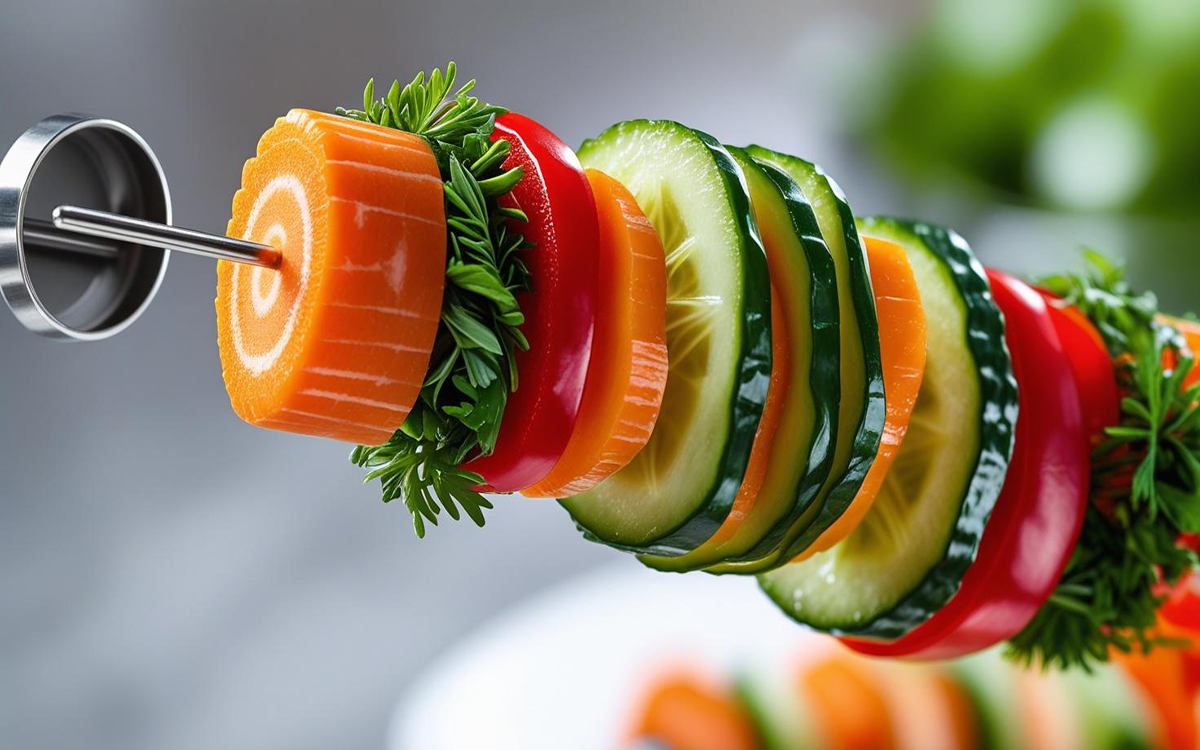
6) Hanging Veggie Skewer
You’ll need: Stainless steel skewer with end cap (preferred) or thick food‑safe twine, mixed veg.
How to Make It
- Prep produce: Wash; cut to ½”–¾” chunks. Combine firm (pepper, carrot) and soft (cuke, leafy) pieces.
- Load order: Start with a firm “stopper” slice (e.g., carrot coin), then alternate colors/textures.
- Cap & hang: Secure the end cap. Hang so the lowest veg sits at piggy nose height (½–1″ above ground to encourage gentle stretch, not strain).
- If using twine: Tie a large knot below the bottom veg; add simple overhand knots between pieces to stop sliding. Supervise; remove when unattended.
- Freshness rule: Replace daily; discard leftovers after 1–2 hours to avoid spoilage.
Quick Reference
| Toy | Materials | Build Steps Summary | Difficulty | Time | Supervision |
|---|---|---|---|---|---|
| Cardboard Tube Treat Roller | TP tube, hay, tiny veg, herbs (opt.) | Loosely stuff hay → add veg → crimp ends ¼ → test roll. | Easy | 3–5 min | Low |
| Paper Bag Hideout | Unprinted lunch bag, hay, treats | Roll rim → fill ½ with hay → side‑lay tunnel → place in corner. | Easy | 2–3 min | Low |
| Fleece Rag Ball | Willow/hay ball, fleece strips | Tie strips evenly → stuff hay/veg inside (opt.) → tug‑check knots. | Easy | 8–10 min | Low |
| Cardboard Maze | Boxes, scissors, paper tape (opt.) | Cut 4–5″ doors → arrange U/S layout → seed hay/pellets → stabilize. | Moderate | 15–25 min | Low |
| Foraging Tray | Low tray, shredded paper/fleece, hay, pellets/veg | Layer base → seed treats → light cover → adjust visibility for skill. | Easy | 4–6 min | Low |
| Hanging Veggie Skewer | Stainless skewer or food‑safe twine, mixed veg | Alternate firm/soft veg → cap → hang at nose height; replace daily. | Easy | 3–5 min | Medium* (if twine) |
*Use stainless skewers for lowest risk. If you use twine, supervise and remove after play.
Pro Tips to Keep Enrichment Fresh
- Rotate toys every 2–3 days (novelty boosts engagement).
- Offer one forage, one chew, and one explore/hide toy per session.
- Mirror natural rhythms: brief morning and evening play windows often get the best zoomies.
Conclusion
DIY toys for guinea pigs aren’t just cost-friendly—they’re also a fantastic way to keep your pets happy, healthy, and mentally stimulated. Always keep safety in mind, and rotate toys regularly so your guinea pigs stay interested. With a little creativity, you can transform everyday household items into hours of squeak-worthy fun.